
blog


How to Design a Home Gym Layout That Actually Works Before You Buy Equipment
May 01, 2026
Building a home gym is exciting — but the biggest mistake most buyers make is buying equipment before planning the space.
A machine may look perfect online, but once it arrives, the real questions begin: Will it fit? Can you move around it? Is the ceiling high enough? Where will the bench go? Can you still open doors, load plates, and train safely?
A good home gym is not just about having great equipment. It is about creating a layout that feels comfortable, safe, practical, and motivating to use every day.
Before you invest in a Smith machine, functional trainer, power rack, bench, dumbbells, or cardio equipment, use this guide to plan your home gym layout properly.
Why Home Gym Layout Matters More Than Most People Think
Many people focus only on the equipment itself. They compare price, weight capacity, attachments, and features — which is important. But layout can make or break the entire experience.
Even high-quality equipment can feel frustrating if it is placed in the wrong spot.
- You may not have enough room to pull cables fully.
- You may struggle to move the bench in and out.
- You may not have space to load plates on both sides.
- You may block storage, doors, or walkways.
- You may lose motivation because the gym feels cramped.
The best home gyms are designed around movement first, equipment second.
Step 1: Measure Your Space Correctly
Before choosing equipment, measure your space carefully. Do not rely on rough guesses.
You need to know:
- Total room width
- Total room length
- Ceiling height
- Door width
- Stairway or basement access
- Wall obstructions
- Window placement
- Electrical outlets
- Floor type
This is especially important for basement gyms, garage gyms, and smaller rooms where every inch matters.
| Measurement | Why It Matters |
|---|---|
| Ceiling Height | Important for pull-ups, overhead presses, lat pulldowns, and tall machines. |
| Room Width | Needed for barbell space, cable movement, and loading plates. |
| Room Length | Important for benches, cardio machines, and walking space. |
| Door Width | Determines whether large equipment can be moved into the room. |
| Floor Type | Affects stability, noise, vibration, and protection. |
Step 2: Choose the Main Purpose of Your Gym
Not every home gym needs the same layout. A gym built for bodybuilding will look different from a gym built for weight loss, general fitness, or athletic training.
Before buying anything, decide what your main goal is.
| Your Main Goal | Best Equipment Focus | Layout Priority |
|---|---|---|
| Muscle Building | Smith machine, bench, dumbbells, plates | Stable lifting area with enough bench movement space |
| Functional Training | Functional trainer, cable machine, open floor area | Wide cable clearance and movement zone |
| Weight Loss | Cardio machine, dumbbells, cable system | Easy flow between cardio and strength |
| Family Home Gym | All-in-one machine, adjustable bench, storage | Safe and organized layout for multiple users |
| Small Space Gym | Compact all-in-one system, foldable bench, adjustable dumbbells | Maximum function in minimum footprint |
Step 3: Start With the Anchor Piece
Every good home gym layout starts with one main anchor piece. This is usually the largest and most important machine in the room.
For many home gyms, the anchor piece is one of the following:
- All-in-one Smith machine
- Functional trainer
- Power rack
- Squat rack
- Leg press / hack squat machine
Place this item first in your layout. Everything else should be arranged around it.
For example, if you choose an all-in-one Smith machine, it should usually sit against the main wall with enough space in front for a bench, bar movement, and cable exercises.
Step 4: Understand Clearance Space
The machine footprint is only part of the story. You also need clearance space.
Clearance space means the room you need around the equipment to use it properly.
| Equipment Type | Minimum Clearance Needed | Why |
|---|---|---|
| Smith Machine / All-in-One Gym | 2–3 ft in front and sides | For bench movement, plate loading, and safe training. |
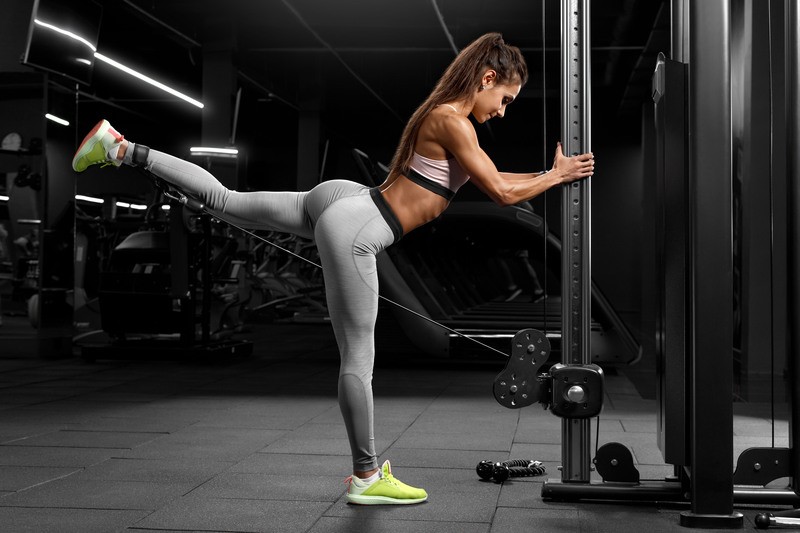
| Functional Trainer | 3–5 ft in front | For cable flys, rows, presses, and rotational movements. |
| Power Rack | 2–3 ft around rack | For barbell loading and safety access. |
| Adjustable Bench | Enough room to move forward/back | Needed for incline, flat, and seated exercises. |
| Cardio Machine | 1–2 ft around machine | For safe entry, exit, and ventilation. |
A common mistake is looking only at product dimensions. Always add working space around the equipment.
Step 5: Create Training Zones
A smart home gym should be divided into zones. This makes the room feel organized and easier to use.
| Zone | What Goes There | Why It Helps |
|---|---|---|
| Strength Zone | Smith machine, power rack, plates, barbell | Keeps heavy lifting in one stable area. |
| Cable Zone | Functional trainer, cable attachments | Allows full cable movement without obstruction. |
| Free Weight Zone | Dumbbells, kettlebells, adjustable bench | Creates space for pressing, rows, curls, and accessory work. |
| Cardio Zone | Treadmill, bike, stair climber, rower | Keeps conditioning equipment separate from lifting space. |
| Storage Zone | Plates, attachments, mats, bands | Reduces clutter and improves safety. |
Step 6: Plan Around the Bench
The bench is one of the most used pieces in a home gym, but many people forget how much space it needs.
An adjustable bench needs room to move between:
- Flat bench press
- Incline press
- Shoulder press
- Rows
- Step-ups
- Bulgarian split squats
If the bench is too close to a wall or another machine, your workout becomes uncomfortable quickly.
A good rule: leave enough open space in front of your main machine so the bench can move freely.
Step 7: Do Not Forget Plate Loading Space
If your machine uses weight plates, you need side clearance.
This is important for:
- Smith machines
- Leg press machines
- Hack squat machines
- Plate-loaded functional trainers
- Plate-loaded strength machines
If the machine is too close to a wall, loading plates becomes annoying and unsafe.
| Setup | Recommended Side Space |
|---|---|
| Light plate-loaded equipment | At least 18–24 inches per side |
| Smith machine with plate storage | At least 24–36 inches per side |
| Leg press / hack squat | At least 24–36 inches near loading horns |
Step 8: Think About Ceiling Height
Ceiling height is one of the biggest issues in basement gyms.
Low ceilings can limit:
- Pull-ups
- Overhead presses
- Lat pulldowns
- Tall functional trainers
- Smith machine exercises
| Ceiling Height | What It Usually Allows |
|---|---|
| Under 7 ft | Limited options; choose compact equipment carefully. |
| 7–8 ft | Works for many home gyms, but check machine height. |
| 8–9 ft | Comfortable for most Smith machines and functional trainers. |
| 9 ft+ | Best for full racks, pull-ups, overhead movements, and larger setups. |
Always check the total machine height before ordering. Also consider your own height when doing pull-ups or overhead exercises.
Step 9: Basement Gym vs Garage Gym
Basements and garages are the two most common home gym locations, but they require different planning.
| Location | Advantages | Challenges |
|---|---|---|
| Basement Gym | Private, climate controlled, convenient | Lower ceilings, stairs, difficult equipment access |
| Garage Gym | More open space, easier delivery access, stronger floors | Temperature changes, moisture, dust, less polished look |
For basement gyms, measure stairways and ceiling height carefully. For garage gyms, think about flooring, heating, ventilation, and moisture protection.
Step 10: Flooring Is Not Optional
Good flooring protects your equipment, your floor, and your joints.
Gym flooring also helps reduce noise and vibration, especially if you train in a basement, condo, or shared family space.
| Flooring Type | Best For | Notes |
|---|---|---|
| Rubber Tiles | Strength training and home gyms | Easy to install and replace. |
| Rubber Rolls | Larger gym spaces | Clean professional look with fewer seams. |
| Foam Mats | Light exercise only | Not ideal for heavy equipment. |
| Horse Stall Mats | Garage gyms and heavy lifting | Very durable but heavy and may have odor at first. |
Avoid placing heavy machines directly on hardwood, tile, or thin carpet without proper protection.
Step 11: Storage Makes the Gym Feel Bigger
A messy gym feels smaller than it really is.
Storage is not just about appearance. It improves safety and makes workouts faster.
Plan storage for:
- Weight plates
- Dumbbells
- Cable attachments
- Resistance bands
- Bars
- Clips and collars
- Mats and accessories
Wall storage, plate trees, dumbbell racks, and attachment holders can make even a small gym feel much more professional.
Step 12: Avoid These Common Home Gym Layout Mistakes
| Mistake | Why It Causes Problems | Better Solution |
|---|---|---|
| Buying equipment before measuring | The machine may not fit or function properly. | Measure the room and plan the layout first. |
| Ignoring cable travel | Cable exercises feel limited or awkward. | Leave open space in front of functional trainers. |
| No room for bench movement | Pressing and seated exercises become difficult. | Keep the center area open. |
| Putting machines too close to walls | Plate loading and maintenance become hard. | Leave side clearance. |
| No storage plan | The room becomes cluttered and unsafe. | Add racks, holders, or wall storage. |
| Choosing too many machines | The gym feels crowded and hard to use. | Choose versatile equipment first. |
Best Layout Ideas by Room Size
Small Home Gym: 6 ft x 8 ft
A small space can still work well if you choose compact, versatile equipment.
- Compact functional trainer or wall-mounted cable machine
- Adjustable bench
- Adjustable dumbbells
- Wall storage for attachments
- Rubber flooring
Medium Home Gym: 8 ft x 10 ft
This is a strong size for many home gym owners. You can fit a larger all-in-one system with room for bench work.
- All-in-one Smith machine or functional trainer
- Adjustable bench
- Dumbbell rack or adjustable dumbbells
- Plate storage
- Small open movement zone
Large Home Gym: 10 ft x 12 ft+
A larger space gives you more freedom to separate training zones.
- Smith machine or power rack
- Functional trainer
- Leg machine or cardio machine
- Dedicated dumbbell area
- Storage wall
- Open floor space
Sample Layout: 8 ft x 10 ft Home Gym
Here is a practical example for a common home gym size.
| Area | Recommended Placement |
|---|---|
| Back Wall | All-in-one Smith machine or functional trainer |
| Center Space | Adjustable bench and training area |
| Side Wall | Dumbbells, plate storage, cable attachments |
| Corner | Mat, bands, small accessories |
| Open Area | Lunges, mobility, stretching, cable work |
This layout works because the largest machine stays against the wall, the bench can move freely, and storage stays out of the main training path.
Should You Buy One All-in-One Machine or Several Separate Machines?
This depends on your space and training goals.
| Option | Best For | Pros | Cons |
|---|---|---|---|
| All-in-One Machine | Most home gyms | Saves space, offers many exercises, clean setup | Requires careful placement and enough ceiling height |
| Separate Machines | Large rooms and specialized training | More dedicated stations, commercial feel | Uses more space and costs more |
| Minimal Setup | Small rooms and beginners | Lower cost, flexible, easy to adjust | Less exercise variety |
For most home users, an all-in-one Smith machine or functional trainer gives the best balance of space, versatility, and long-term value.
What Makes a Home Gym Feel Professional?
A professional-looking gym does not need to be huge. It needs to be organized, practical, and intentional.
Small details make a big difference:
- Consistent flooring
- Clean equipment placement
- Good lighting
- Wall storage
- No clutter on the floor
- Enough walking space
- Mirrors in useful locations
- Clear training zones
When the space feels good, you are more likely to use it consistently.
Home Gym Layout Checklist Before You Buy
| Question | Yes / No |
|---|---|
| Did you measure ceiling height? | |
| Did you measure room width and length? | |
| Did you check doorways and stair access? | |
| Did you add clearance space around equipment? | |
| Did you plan where the bench will move? | |
| Did you plan plate and attachment storage? | |
| Did you choose proper flooring? | |
| Did you leave open space for movement? | |
| Did you choose equipment based on your goals? |
A great home gym is not built by filling a room with random equipment.It is built by planning the space properly, choosing the right anchor piece, leaving enough clearance, and making sure every item has a purpose.
Before you buy, think about how you will actually train in the room. Where will you stand? Where will the bench go? Can you load plates safely? Can you move comfortably? Will the space still feel good after six months?
When your layout is right, your home gym becomes easier to use, safer to train in, and more motivating long term.
The smartest home gym is not always the biggest one. It is the one that works for your space, your goals, and your daily routine.
Need Help Planning Your Home Gym?
At GearForFit, we help customers choose equipment based on real space, real goals, and real training needs.
If you are planning a basement gym, garage gym, small home gym, or full strength training setup, contact us with:
- Your room dimensions
- Your ceiling height
- Your training goals
- Your preferred equipment type
- Your budget range
We can help you choose a setup that fits properly, trains well, and makes sense for the long term.